
Even though my “daily bread” no longer is the traditional understanding of daily bread, I still consider it my daily “bread.” After all, I’m not only alive, but I am healthier after giving up the former for the latter! As most of you know, Hashimotos Thyroiditis does not think well of the glutened sustenance of the past. So, this post was requested by one of my readers to give an idea of my typical day of eating. I must say that there is much more variety in the summer for me so I am not picturing the occasional sweet indulgence of peaches, blueberries, watermelon, etc. but I am most interested in giving you a peek at my prepared food which most of the basics were learned over at the online class by GNOWFLINS which I highly recommend for anyone just starting out who wants to learn traditional food preparation methods. I love that God has given such a great variety of “fast foods” in the market during this time of year in the form of these beautiful organic fruits but it helps even more that I live in the San Joaquin Valley of California where produce is so concentrated and freshness is at it’s peak!
I want to be very clear that I have been on the GAPS Diet for over 16 months and some of the foods I show may not have been in my diet just a few weeks/months ago. Conversely, some of these foods might be taken out of my diet in the near future. It’s just that way with food sensitivities, unfortunately. The most important thing here is just to give ideas. Your food intolerances or sensitivities may, and probably do, vary from mine. So, perhaps you will just get ideas or maybe you will look at this food as too basic for your tastes. I have learned that the more basic, the better, for my body. So you will not be seeing any “gourmet” meals here. But rather, I work to be sure they are nourishing to my body so they can help me along towards better health!
 As an example of foods that have come in and out of my diet, the first meal up is my breakfast which consisted of eggs with dates, a cup of homemade chicken broth, and for the first time in a long time, GAPS friendly white beans, mashed into a re-fried state using beef tallow and a bit of chicken stock to re-moisten. I normally would stick with just eggs or eggs and a beef patty. I am not a recipe person so I will just tell you what I did. I can have butter (I am otherwise dairy-free) so I used butter from grass fed cows liberally in the pan (perhaps 2 tablespoons). After heating I added one to two dates chopped (medjooled is my favorite for this), quickly stirred into the butter without letting the butter begin to burn, then added some beaten and salted (Real Salt or another non-iodized salt) eggs (I used 2). I then carefully and gently scrambled the eggs just until barely cooked through. This makes for a soft and delicious scrambled egg that seriously tastes like french toast. At least it does to my GAPS trained taste buds. On the side I used a 24 hour soaked white bean (GAPS allowable and can be learned here by clicking the link “How to Cook Dried Beans” prior to the recipe) and cooked the day before, added it to a tablespoon of my own rendered beef tallow, fried for a short amount of time and then as I mashed the beans, I added just a bit of my homemade chicken broth and salt to them for added flavor and nutrition. I topped this off with a cup of homemade chicken broth and that was my breakfast and it was yummy. I will only eat beans once in a while unless I feel they are bothering me. I take them out if I am already having some digestion issues. This is the first time I have used them in months.
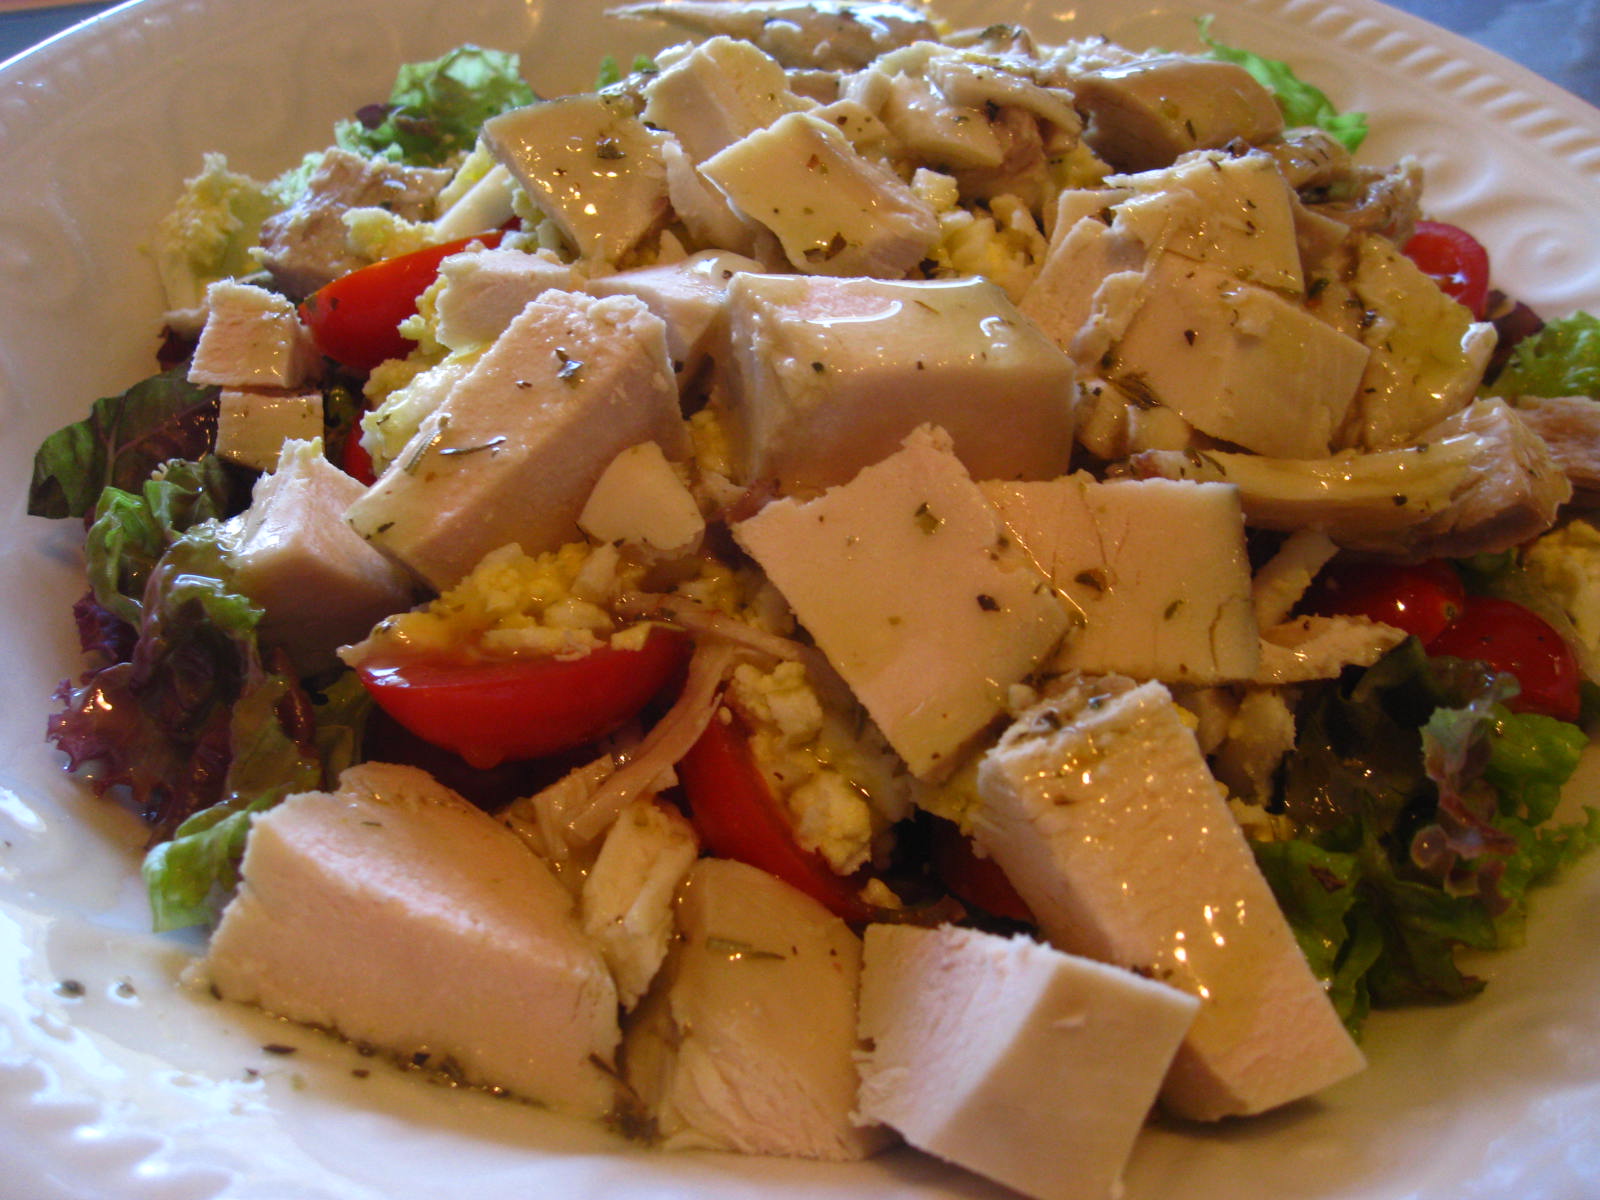 Next up is lunch. This is almost always a salad (since I have been making homemade mayo, it can also be chicken salad or salmon salad for a quick lunch) or I make the salad my dinner and something different for lunch but a salad is pretty much a mainstay in my daily diet. It is slightly altered by moods I might be in but admittedly I have an addiction to tomatoes so they are almost always in there! In fact, after going on GAPS, I found tomatoes to be my special treat, especially cherry tomatoes. However, I understand nightshades should be carefully considered in the diet for those with autoimmune disease and I am contemplating when I will be taking them out. I feel I need to take this step but I have come a long way and I am not feeling so bad anymore so I am taking my time with the steps that remain to continue my healing protocol. You might not be able to tolerate them so please don’t use them if you have a feeling they are hurting you. Usually joint and muscle pain is a sign that nightshades should be avoided but since those are not my symptoms at this time, I am putting it off while pursuing other healing paths at the moment. This salad is a bit heavy on the chicken but I vary this depending on my hunger level. This chicken was purchased from a local farm and was pastured for most of it’s life except some grain feed when not foraging. After 5-7 hours kept whole in the slow cooker, I take off the meat and immediately use the bones for my chicken broth. This is part of my weekly routine and one of the best lessons I learned in the online class at GNOWFLINS. It has been a great time saver. Then for a few days, there will be chicken and broth available all the time for whatever uses I need it for. In this case you see it topping my salad.
For the salad, I pre-wash my lettuce to have a supply for a couple days so it is fast and easy to put together. This is part of the battle when eating this way – having things made ahead of your hunger. Otherwise, it can be very discouraging! In this salad I also have boiled eggs mashed to make it look kind of like blue cheese (I am still dairy free except ghee and butter so I miss my cheese!), cherry tomatoes, and a couple chopped dates (for this I use Deglat Dates, a different date that are dryer and better for in a salad which I can get at my local Costco). For the dressing, it is always the same. I eyeball the recipe daily but try to make enough to last a few days when possible. I start with the juice of one organic lemon in the bottom of my mixing jar (I use this one that I totally LOVE now), add about 1/2 tsp. of Coleman’s Dry Mustard (confirmed gluten free at the time of this post), a teaspoon or less of Real Salt, 1 tablespoon of Italian Seasoning from McCormick (also confirmed at the time of this writing as gluten free), and a small amount of my favorite raw honey (about 1 teaspoon or so) to balance the flavors out. Shake it up as well as possible and then add your favorite organic extra virgin olive oil. I currently use this one from my local Trader Joe’s but I’m looking for a farm-to-consumer local supply at the moment. I add a lot of olive oil but it is up to you how much. Mine usually goes up to the top of the jar. You can decide how much of the dressing to put on your salad. I also used to keep the salt out and salt my salad after adding the dressing as a different way to monitor the amount of salt you might want. Whatever works for you!
For dinner, I have two examples. This post happened between two bulk meals so I thought I’d give you a snapshot of each. One is a basic stew made with a variety of vegetables in a base of beef or chicken stock with the meat of your choice. The second is a popular meal in my home which is an equivalent to a fast food meal for us. I make hamburger patties in bulk and then make protein burgers out of them when I don’t feel like cooking much or it is hot outside and I don’t want to heat up the house. Both meals will be shown below:

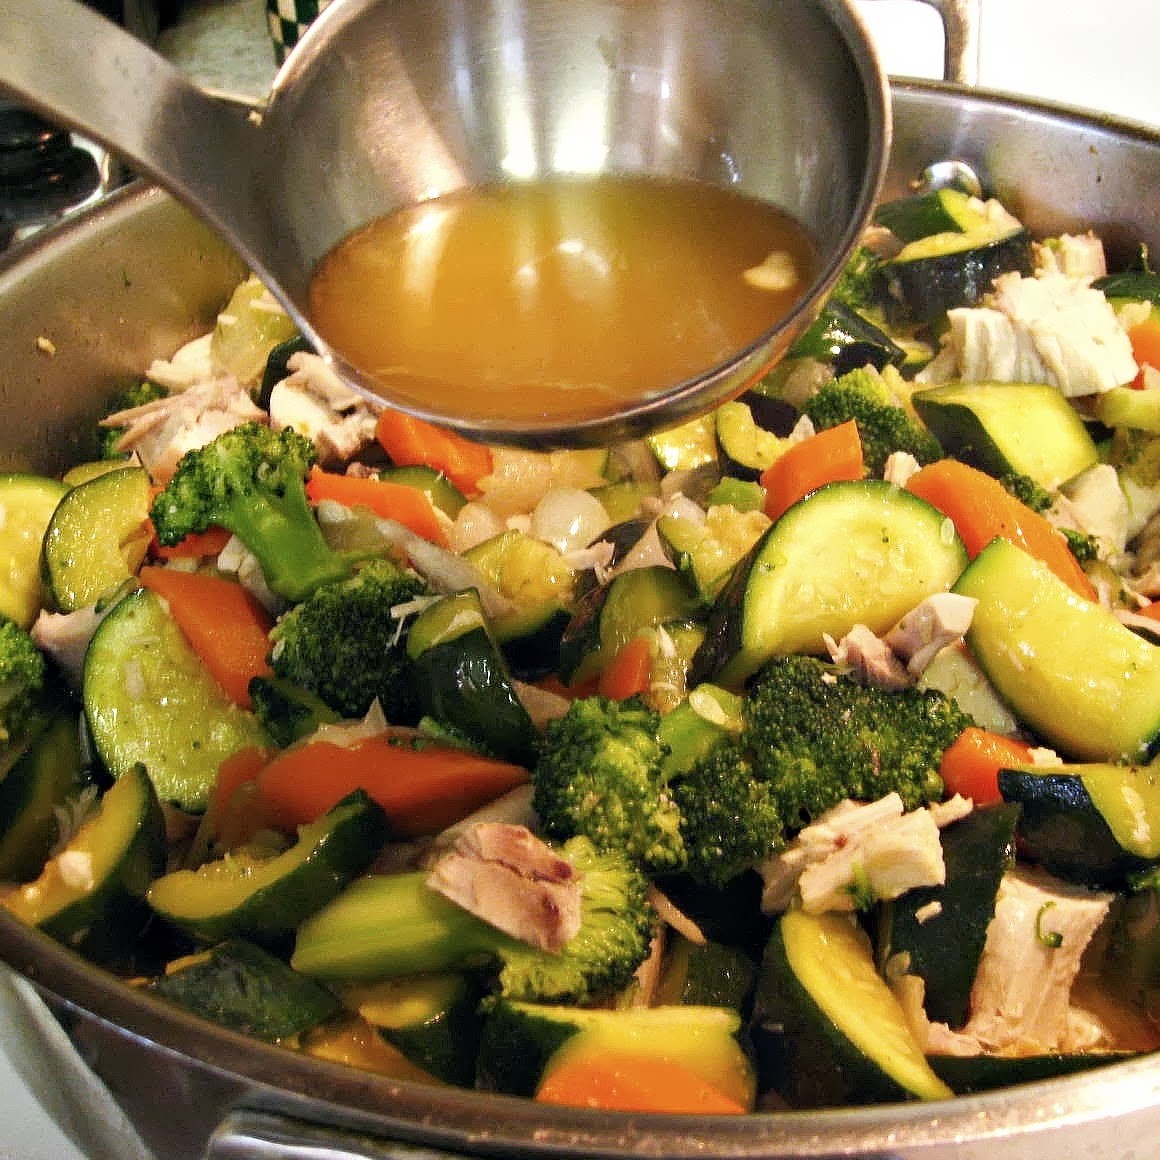
What I like about this type of meal is that it is so forgiving. You need not have all the ingredients available. Just squash alone works in a pinch and a bit of meat. But this time I had some other options so it had more in it. I prefer this meal as it really allows you to have way more vegetables in your meal than meat and sometimes I don’t feel like that much meat. I begin by using my tallow (or you can use ghee or coconut oil) to brown my onions (1 or 2 sliced or chopped), add your chopped veggies in order of their cooking needs. Season as you go. In this meal I chose to boil my carrots ahead since they take a long time to soften in a dish like this. So I added them after all the other veggies. In fact, I also boiled my broccoli ahead for the same reason. This makes putting the stew together extremely quick. Some may even choose to use confirmed gluten free frozen veggies to make this even simpler. I’m not a big fan of frozen veggies but in the winter, they are very welcome! Once the veggies are cooked to the desired consistency, you can add your pre-cooked chicken or beef (you can also cook your raw meat in the tallow at the beginning and pull it out while the veggies are cooking and then add it back in). There is really no perfect way to do this. At the end I add my homemade chicken or beef stock for flavoring and added nutrition. I love making this when I have the crock pot on with my broth going (as seen in the video on this post) so all I have to do is reach over with a ladle and put in what I need. My absolute favorite seasoning is Vignalta. It is one of those seasonings we don’t go a day without in our home. I use it in all the dishes I make except for my breakfasts and sweets. I often say to my husband that I don’t know how I would survive these simple meals without Vignalta. If you haven’t tried it, I have to whole-heartedly recommend it. And I am a serious non-seasoning person. I don’t like much in my food but this is an everyday indulgence. It turns anything into “something”. My daughter refuses to make mashed potatoes unless Vignalta is in the house. A little goes a long way. Once you make a batch of stew this large, you can use it for either lunch or dinner for a few days. It helps to have something nutritious ready to go at all times in your refrigerator. It also can give you a day or two off of cooking.
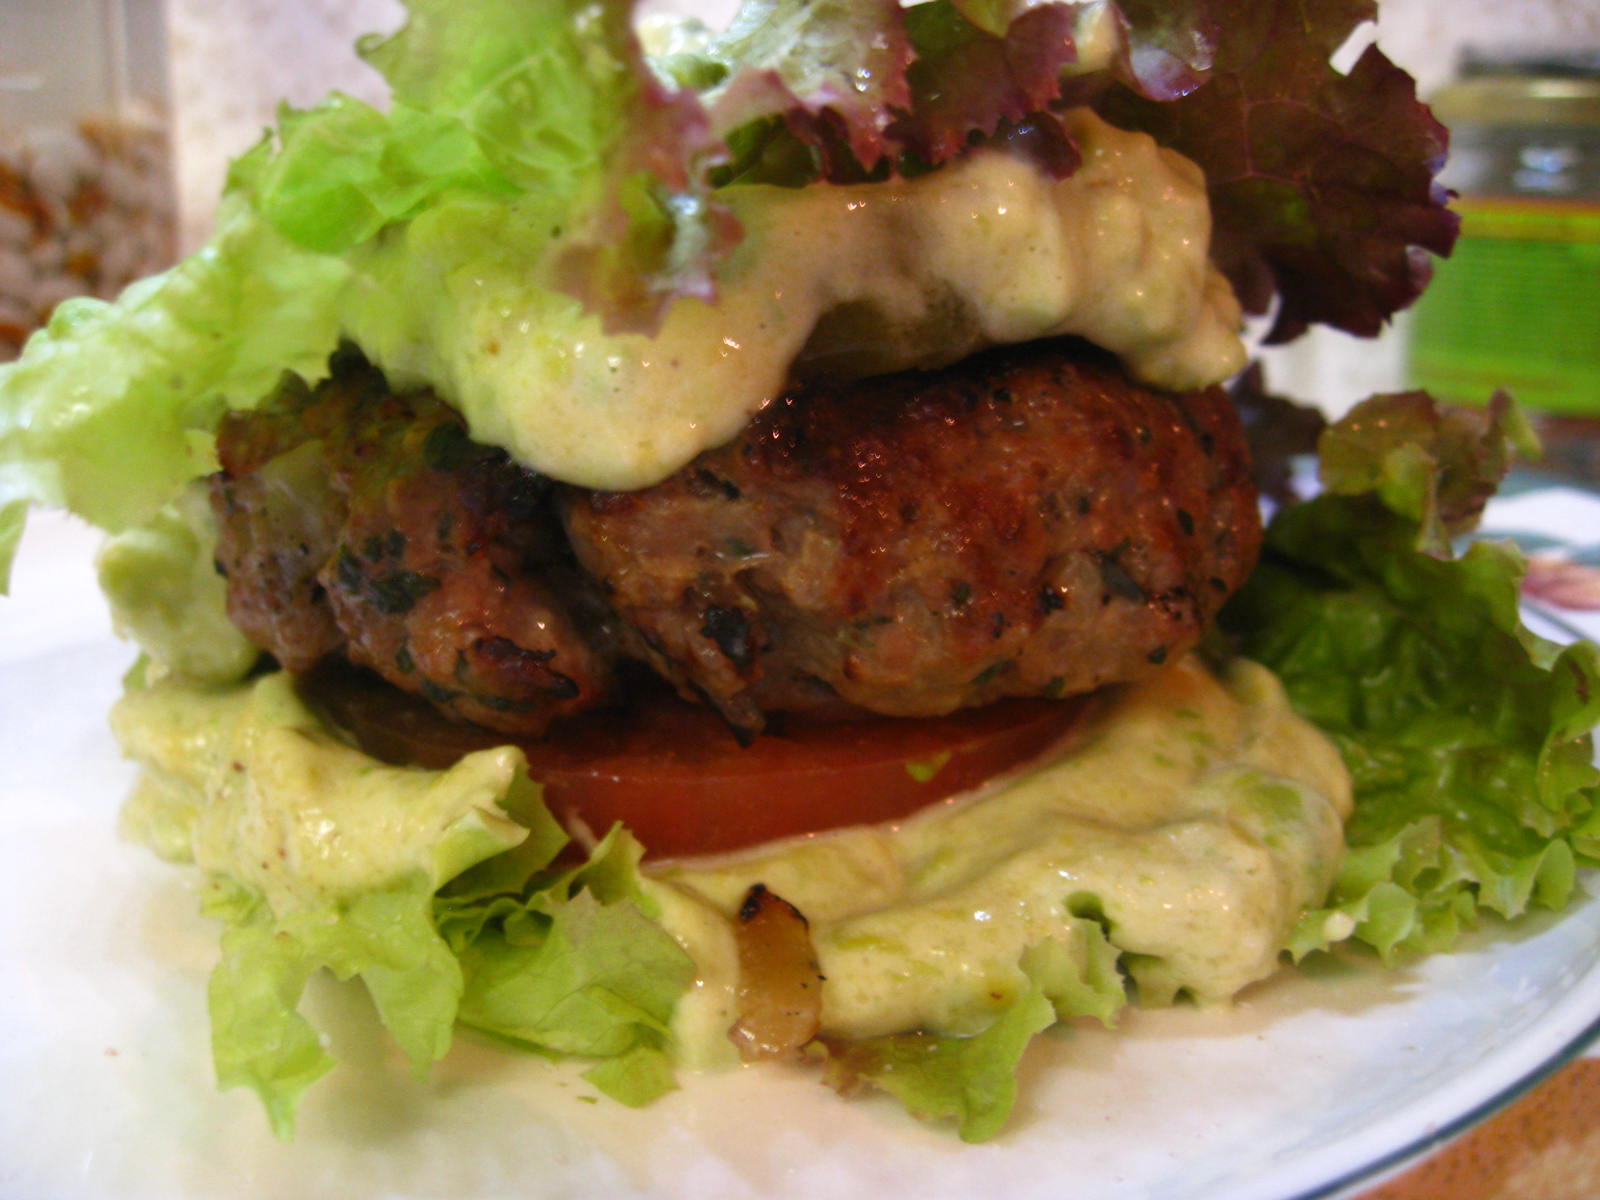 The second dinner idea I am going to show you is my “fast food” meal. This can be a speedy lunch or a lazy dinner. And it is very satisfying. Shown here is my protein burger with homemade mayo and mashed avocado. There is not too much to say about this one. Just make your patties as delicious as possible. Use grass fed beef, gently mix with some Vignalta or salt and pepper, and some type of spice. I think I used Thyme in this one. I always chop a whole onion finely and mix gently in with my meat. These were put on the grill for the 4th of July and I have used them for a few days. Cook just until the internal temperature is where you want it. I use 140 as my base but that is often too cooked for the rest of the people in my family.
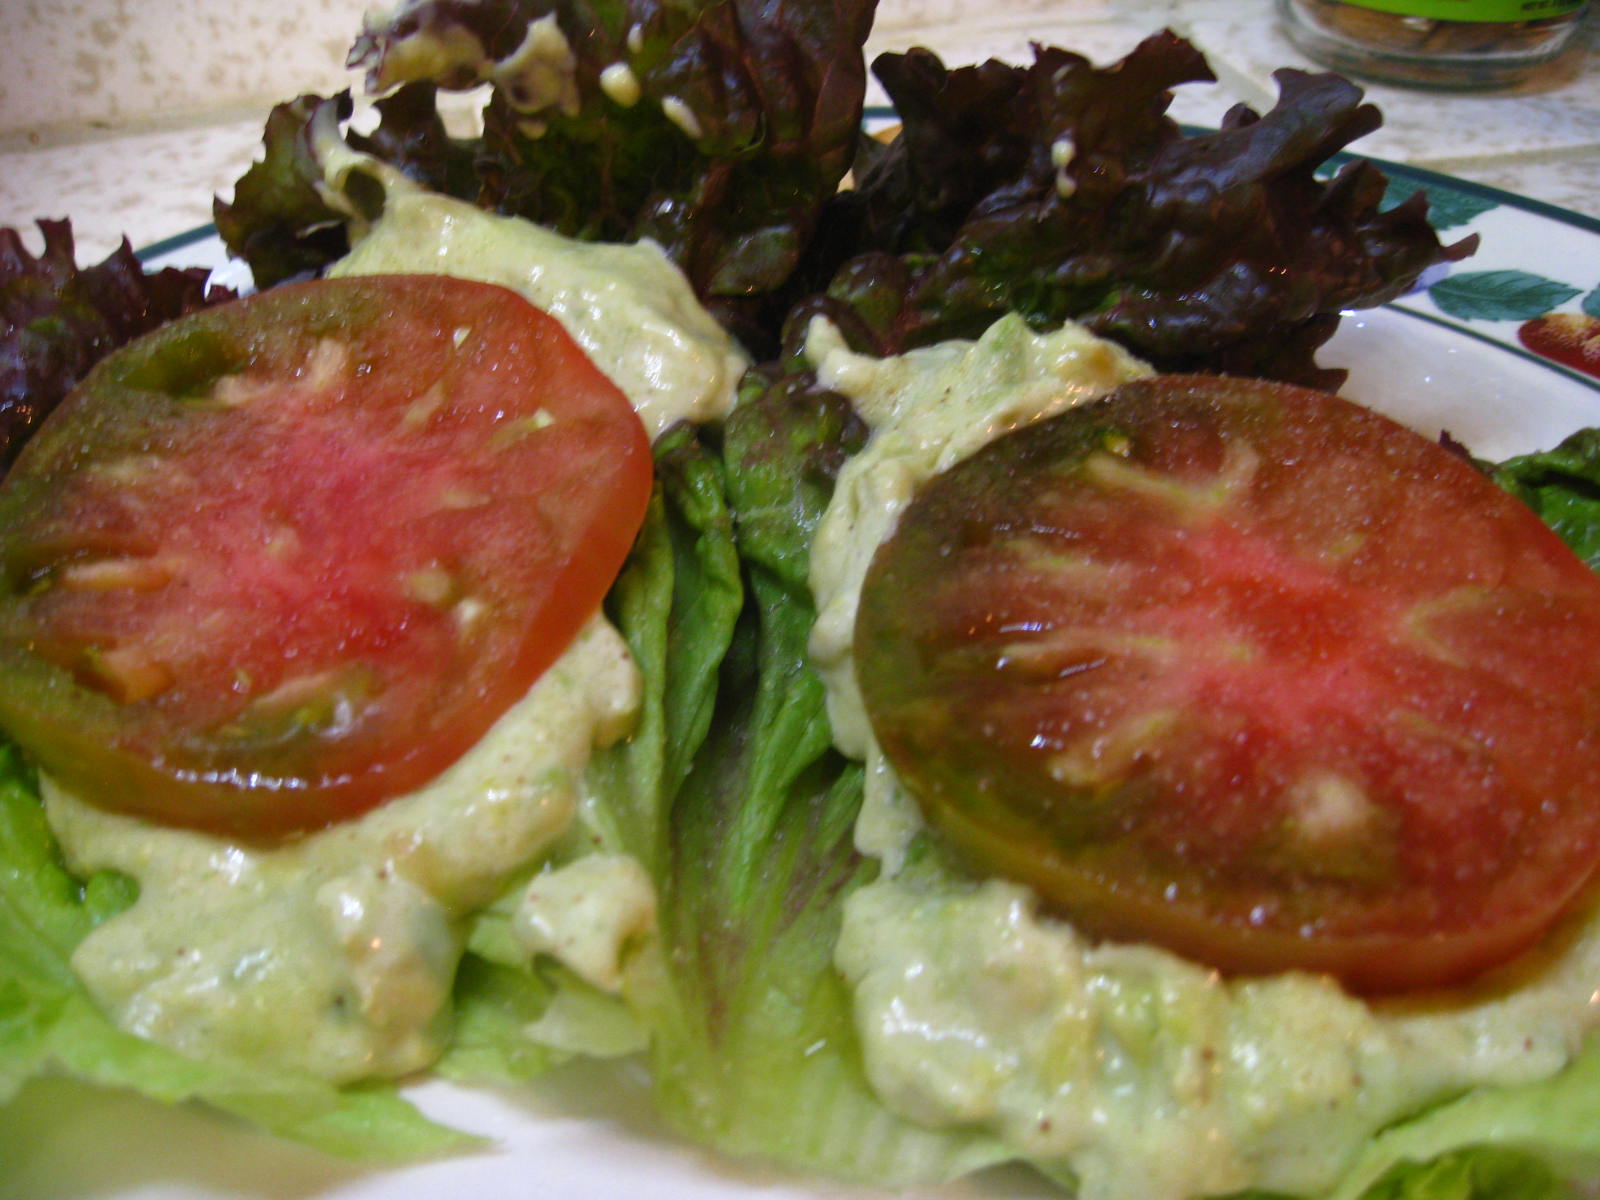 At the bottom of this post you will see the video of how to make the mayo for those who can have the eggs. I use Bertolli Extra Light Olive Oil and that is a bit of a cheat for me. But I do fine with it and to have mayo that tastes better than store bought, I think it is worth the “cheat”. I mix it with a mashed 1/2 avocado and it makes the spread for my protein burger. It’s messy but delicious and beats a dry burger anytime. The picture above shows my assembly routine. These are especially good right off the grill. To re-heat your burgers, use a small fry pan, add a bit of water to the bottom and steam it for about 3-5 minutes with a lid on. This keeps you away from the microwave and also keeps the moisture in the meat.
I hope this post wasn’t too long. I was hoping to make it short but as I realized that showing you the ingredients I use would be important, it turned into a lot more info than I was intending. But usually when I put pictures up people want to know what I use so I have done it in this post. Also, I am extremely grateful to you when you use the links to buy anything you were going to buy anyway from Amazon through this blog. It helps keep me stay encouraged to keep the information coming in the form of my blog and Facebook pages. Thank you so much.
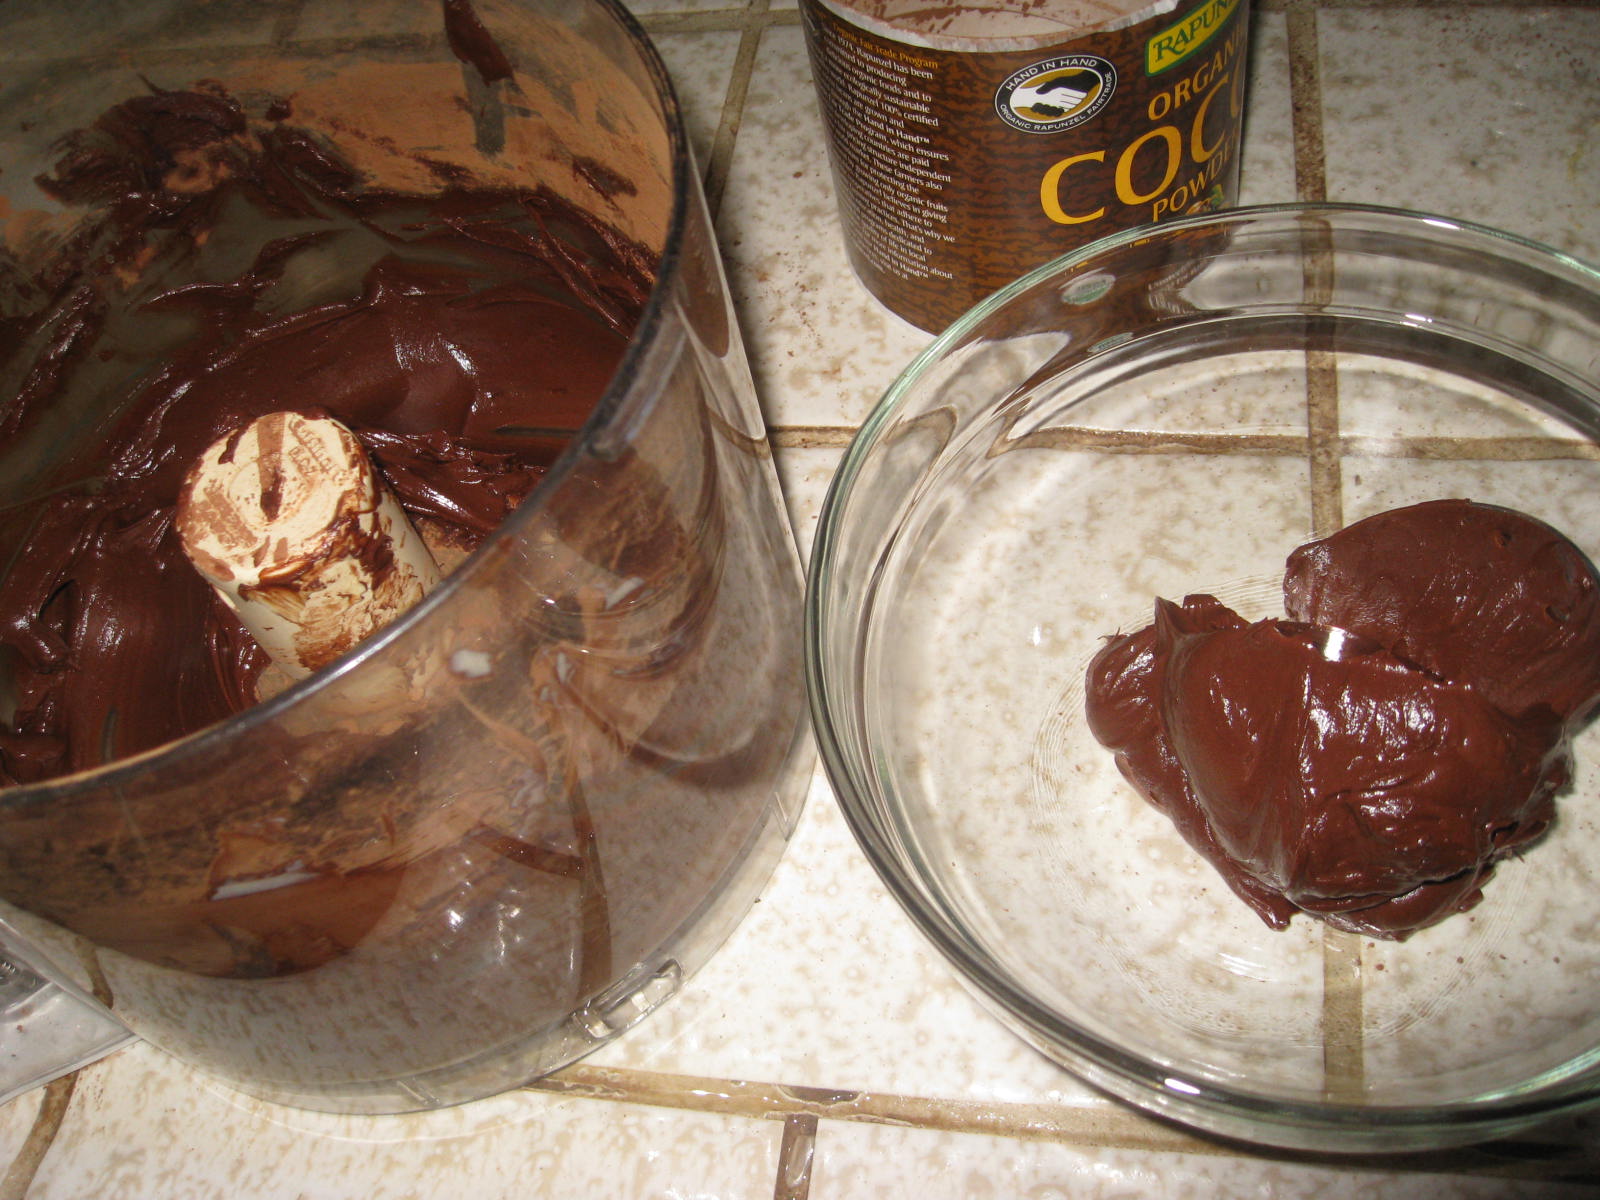
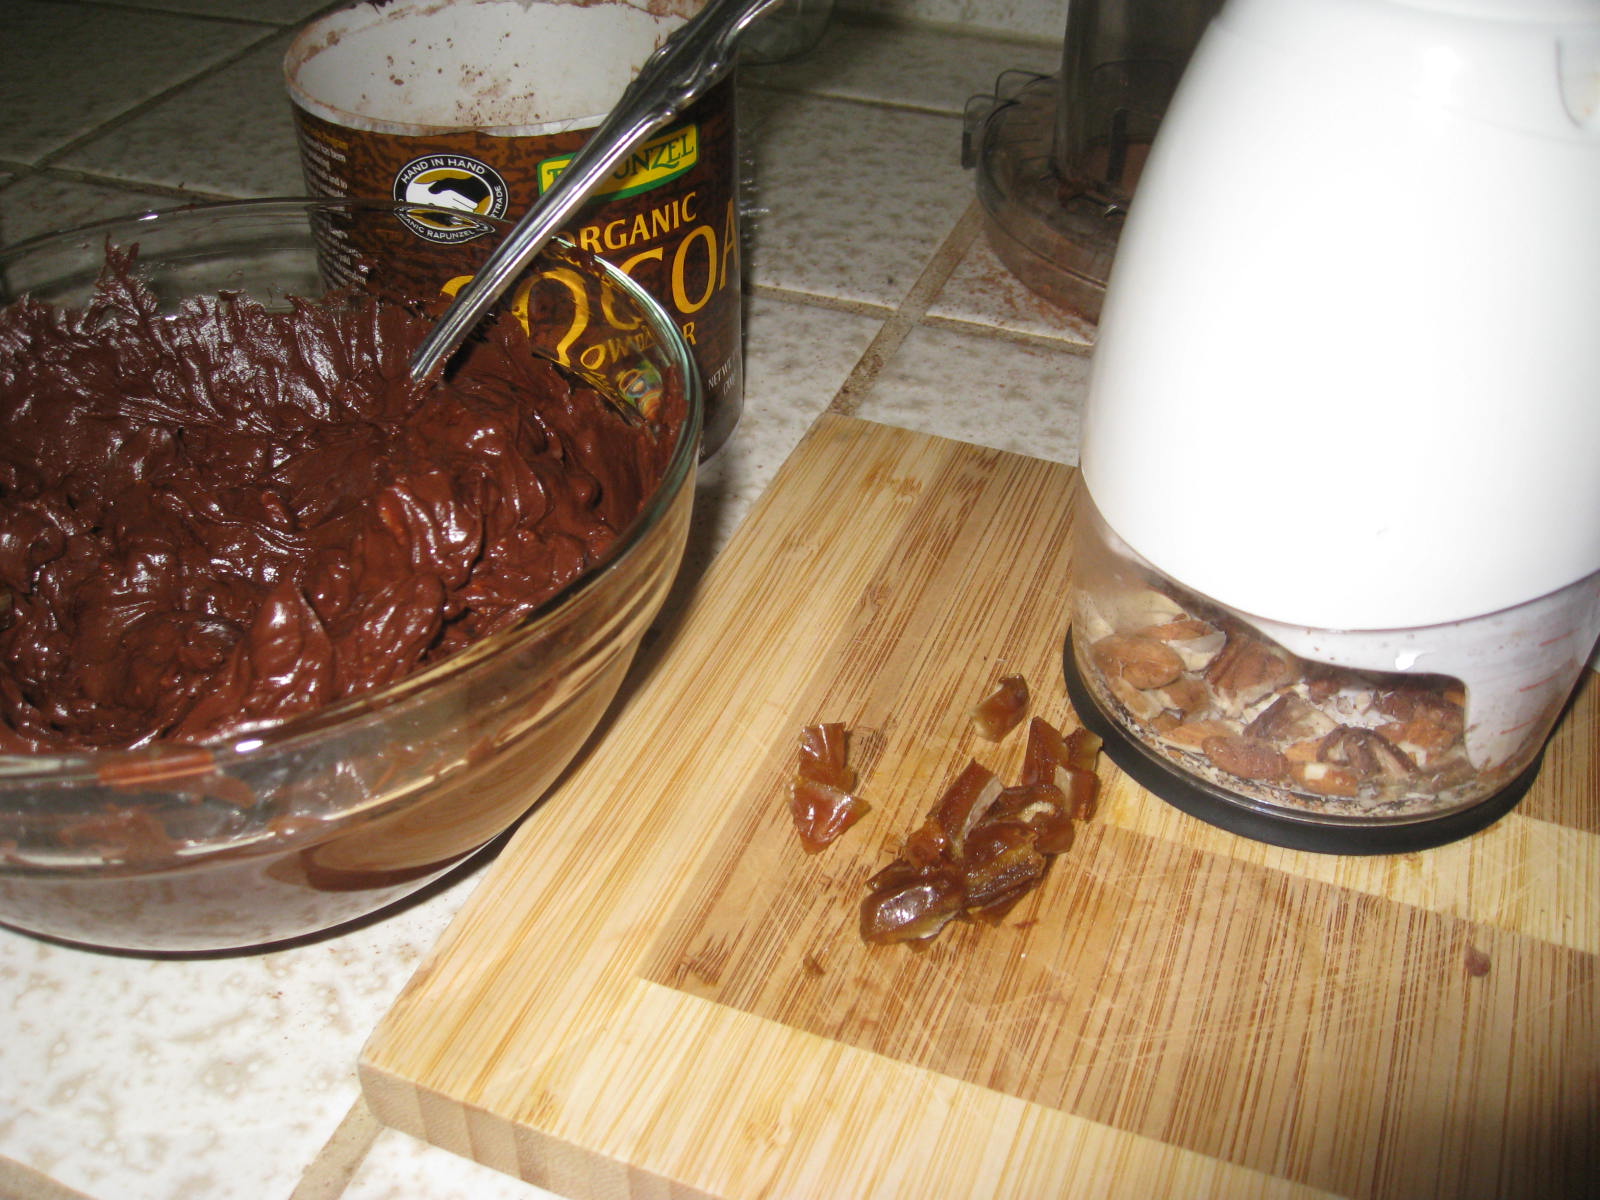
And for the finale, I have my newest “dessert” and snack creation. This can be made with butter from grass fed cows or coconut oil/butter. I have no recipe (again) for this but I can tell you what I do. In fact, I have a couple pictures of the making of this little creation. Basically, it is about one cup of softened unsalted butter (I used Kerry Gold which I can find at Trader Joe’s or Costco), a pinch of salt, about 1/2 cup or more of cocoa powder, (I use this one or this one I found at Ralphs Grocery – both gluten free at the time of this writing), then add honey to taste – it usually comes to about 1/2 cup or so. I prefer the first choice of cocoa powder because it is raw and organic but sometimes I run out before another Internet order. I add some alcohol free vanilla at the end before I add the mix-ins. All this is done in my food processor until the stage of adding the mix-ins. These had chopped dates and chopped Brazil nuts added for the Selenium value. I shape them onto parchment on a cookie sheet (you can use a small cookie scoop or just a teaspoon) in the freezer and drop them into an air tight container after they firm up. This is my “freezer treat” but I tend to make these only about once per month. All things in moderation. I’ll leave you with the photos of the process now. And here’s my Pinterest Board on the subject where I add my favorite meals as I go. Have a great week and I hope you enjoyed this unusual post.


Leave a Reply